CS4730 - HW 4: Camera and Tweening
Github Assignment Link
Every assignment has a Github Classroom Link you must follow to get the starter code (if applicable) and to create your repository for the assignment. If you haven’t yet done so, follow the instructions at the Github Classroom Tutorial.
Assignment Invite Link: COMING SOON
Once your repository is configured, push your code to it in order to submit your work.
Background and Tutorials
In this assignment, we will begin by looking at simple camera controls in Unity. You will learn how to setup a camera and have it follow a character around the screen. You will also use investigate some simple techniques for setting up parallax layers.
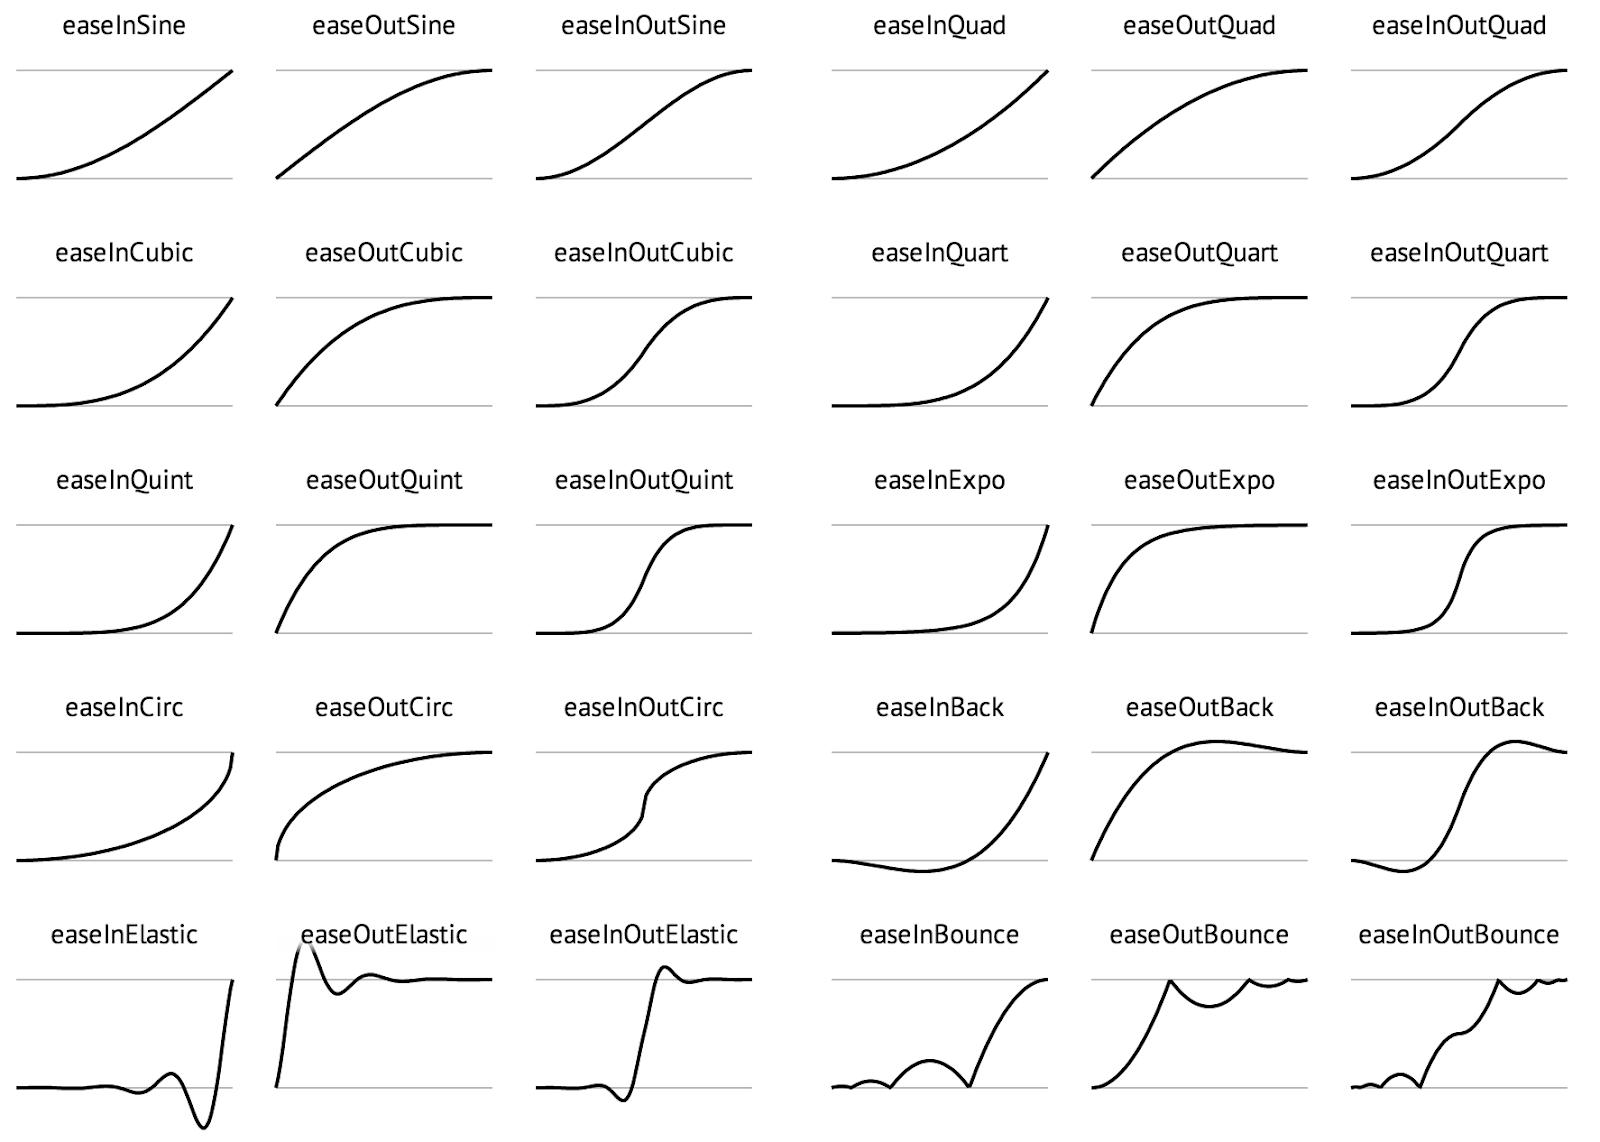
You will also learn a bit about tweening. Tweening is an effect in which the start and end points of a simple animation are defined and all of the states in between those points are calculated and animated on the fly.
You should look over / use these resources while working on this assignment:
Required Features (3 features. 3/3 to pass)
When you clone the repo, there will be a Unity project already present for you to start from. Your submission / demo must have the following required features added to that project:
- Camera Controller
- Open the “Camera” scene. Sayu will automatically begin moving to random positions when you press play.
- Modify the CameraController.cs script to smoothly follow the player
- May not simply make the camera a child of the player. Must have smoothing
- Ensure that the player is always in view, even at high speeds
- Basic Tweening System
- Modify the Tween.cs script
- In it, you will see a switch statement containing most of the commonly used easing functions
- Implement one easing function of each type (Sine, Quad, Cubic, Quart, Quint, Expo, Circ, Back, Elastic, and Bounce)
- Linear doesn’t count.

- Open the “Tweening” scene
- Select BallManager GameObject and in the inspector select a ball sprite of your choice.
- Select the Ball component of each of the four balls and select a different easing function and duration for each.
- Parallax
- Open the “Parallax” scene
- Implement parallaxing in the
Parallax.cs script based on some depth (recommended to use z position as a function of material offset)
- Take one of the background and foreground assets and have them parallax -
- Set up a background and foreground sorting layer and place objects in the appropriate sorting layer.
Optional Features
You can obtain the following optional points on this assignment:
- Camera leading (1 point)
- Bias the camera towards the player’s velocity
- Separate background and foreground into their own cameras (2 points)
- Cameras can be set up to only display certain layers. Set up one camera for foreground elements and one for background elements.
- This allows you to place the background elements elsewhere, at any scale, independent of the player camera, which is much cleaner and less obtrusive.
- Moving parallax elements (1 point)
- Allow certain objects (like clouds) to move independently through the background, adding onto the existing parallax movement.
- Complete the easing functions (1 point)
- Implement the easing functions you skipped over previously.
- 3 for each type (In, Out, and InOut)
- Expanded tweening library (2 points)
- Add functionality for automatically lerping floats
- In other words, the actual lerping should be done in the
ExecuteCoroutine function in Tween.cs
- Add functionality for automatically lerping Vector3s and/or Vector2s
- You will either need to modify the
ExecuteCoroutine signature or make another one.
